Ive had a variety of smart switches for a while – Wifi (Wemo), ZigBee (Generic) and Zwave (Aeotec nano) – I purchased a few different ones and had them installed over the lifetime of my house, but Ive never really found anything that sold me.
- Wemo’s are big and bulky – and dont do anything other than a single gang light switch
- Aeotec nano’s are nice, and work well, but are expensive and require a zwave gateway
- ZigBee generic ones honestly scared me a little bit with how easy it would be for someone to get electrocuted with them (the terminal blocks are really exposed) – they really felt like knock offs and not well made. In hindsight Im concerned that they may not be AU certified. And they have this damn led light that cant be turned off – Its always on.
Recently Bunnings started selling the Arlec “Deta” Smart switches, at a reasonable price – 44$ for a single gang, 50$ for a double, and they have power point varieties as well. I had a few concerns because I dont want to use a cloud service for my automation – Ive done everything i can to run things locally connected to home assistant. But some google indicated that they were just “tuya” devices aka a esp8266 chip with custom firmware, reporting back to a standard cloud service – These should be flashable to tasmota or esphome.
The first one after it was installed, covered over to esphome over-the-air through “tuya-convert” which was an incredibly easy process:
- Build configuration in esphome, and compile – copy the file to the tuya-convert files directory
- Set up a pi with tuya-covert
- Join a phone to the wireless network it makes
- Put device in to paring mode (push an hold button)
The second one, however didnt want to go that way – It appears it had newer firmware which hasnt been reverse engineered yet. Open issue on github confirms. Thankfully, it was easyish to flash with wires. These are mostly my notes
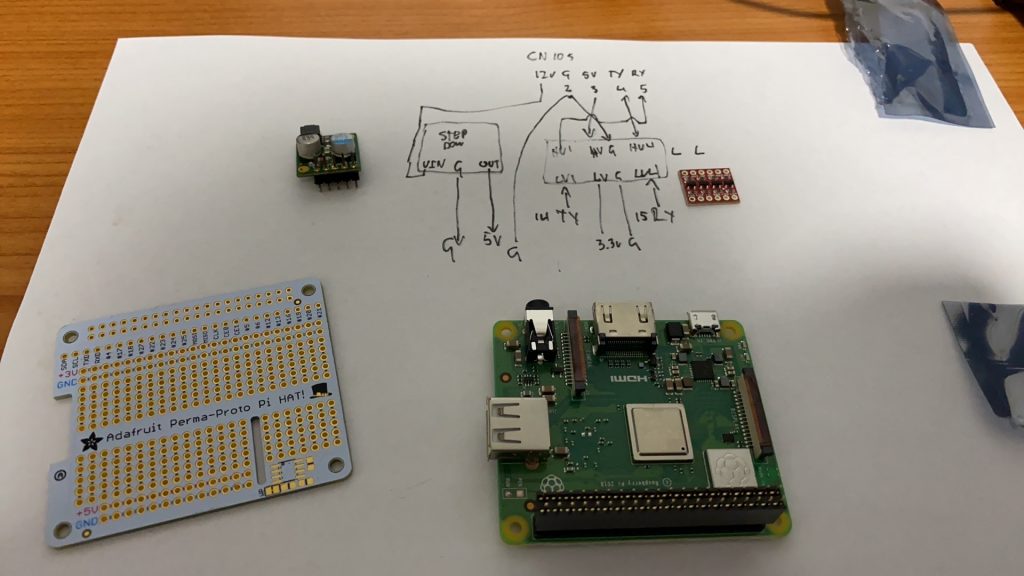
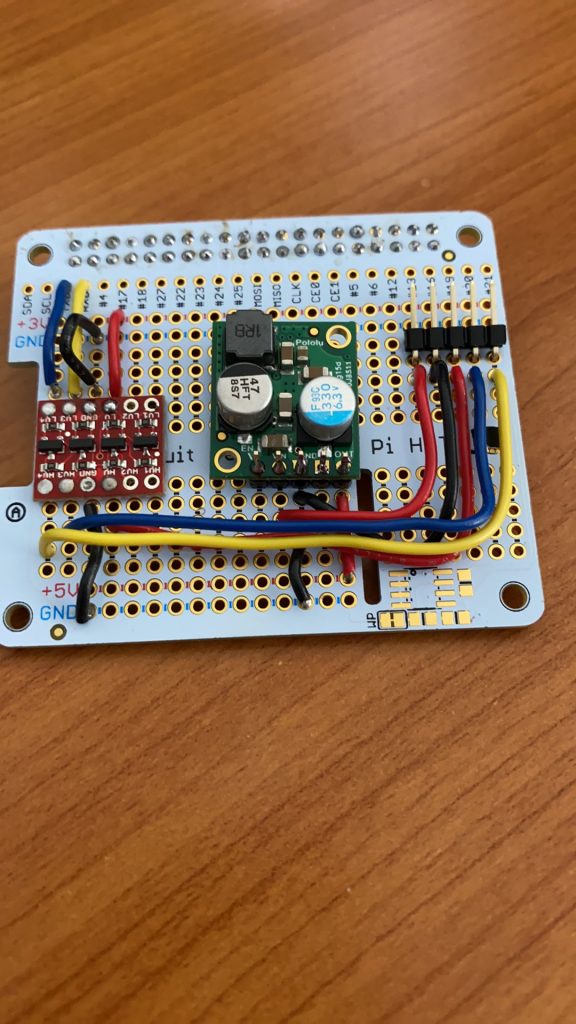
- Configure pi (disable console on serial port, disable bluetooth, enable miniuart)
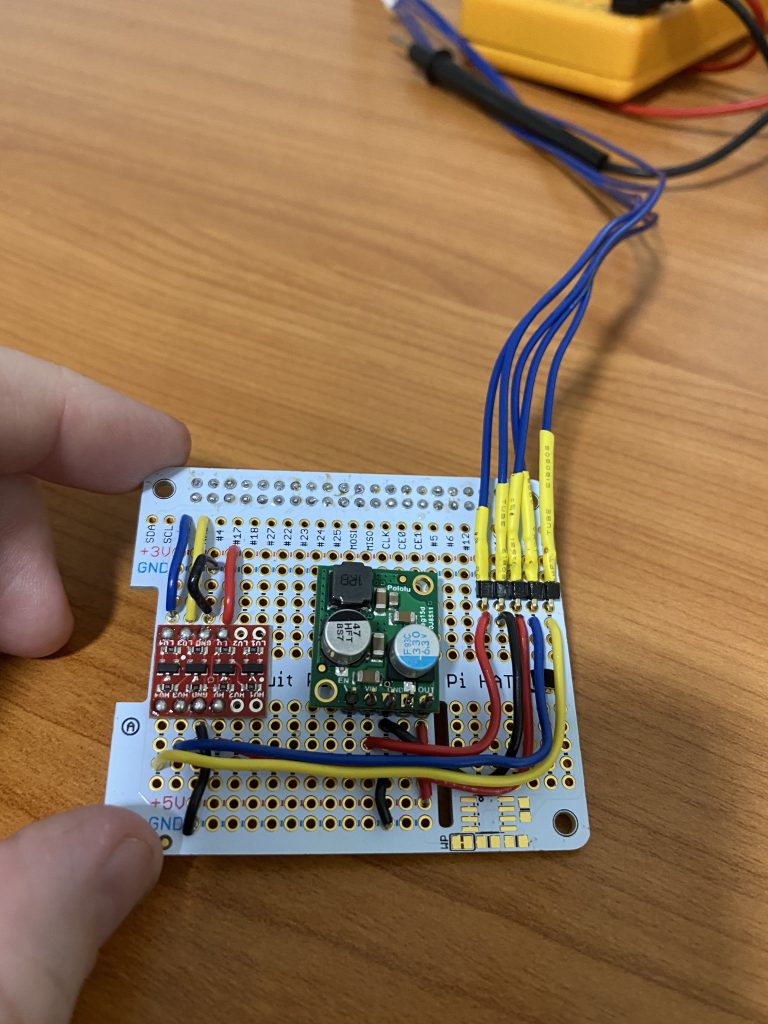
- Use the pintouts from the pi (3.3v or 5v, multiple grounds, TX and RX)
- Ground = grey, white, lighgrey
Transmit = blue - Recieve = yellow
- Power – 3.3v (Red with male plug), 5v (Red with female plug)
- Ground = grey, white, lighgrey
- Put device into flash mode by holding GND to both RST and GPOo (RST is the top left pin of the ESP check when the 8 pin block is a at the bottom. and GPOo is 4th up on the right.)
- run esptool to erase flash
- esptool.py –port /dev/ttyS0 erase_flash
- Put device into flash mode by holding GND to both RST and GPOo
- run esptool to upload firmware
- esptool.py –port /dev/ttyS0 write_flash -fm dout 0x0 ~/src/tuya-convert/files/laundrylightswitch.bin
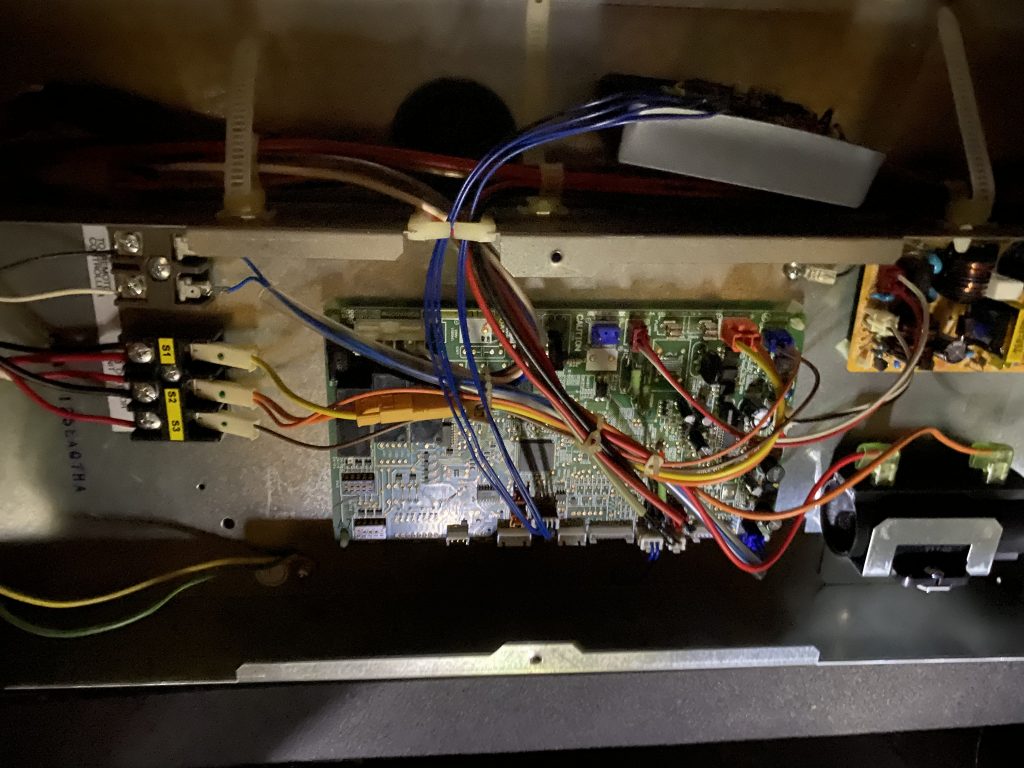
I did run into the problem noted in github below that when powering with 3.3v off the pi, that it would reboot constantly so the suggestion to use the 5v feed through through the existing interface worked well.
Pages i used as reference
- https://tasmota.github.io/docs/Flash-Sonoff-using-Raspberry-Pi/
- https://www.instructables.com/id/Connect-an-ESP8266-to-your-RaspberryPi/
- https://github.com/espressif/esptool/issues/370 – Use 5v port reference
- https://blog.3d-logic.com/2017/12/01/using-raspberry-pi-to-flash-esp8266/
- https://blog.mikejmcguire.com/2019/12/09/deta-grid-connect-smart-switch-and-home-assistant/ — This article taught me the most
- https://blog.mikejmcguire.com/2020/05/22/deta-grid-connect-3-and-4-gang-light-switches-and-home-assistant/ – Same with this one